Setting Up an Active Directory Lab on Apple M-Series (ARM) Devices for OffSec Practice
ACTIVE DIRECTORY
0dd.init
10/18/20256 min read

Ever since I started my cybersecurity journey, I have been working with Linux. I enjoy it, and I find it fun to use and work with. Then one day I realized I didn’t take time to learn something very important when it comes to red teaming and offensive security, i.e., ACTIVE DIRECTORY.
So I decided to give it a try and was trying to build an AD LAB to practice some AD-based offensive security techniques and understand how Active Directory really works. Since my primary computer is an M1 Mac, I soon realized it’s not going to be as easy as it sounds in my head.
You see, computer CPUs come in different types of architectures; the most common ones we use in our day-to-day lives are x86. Intel and AMD make chips based on this architecture. The x86 is used for laptops, computers, servers, and the most common type of CPU in today’s cyberspace. But there’s another type, the ARM processor.
These are mainly used in IOT devices and more modern CPUs like the M1 chip from Apple and Raspberry Pi. Unlike Linux, which runs on anything, Windows is still catching up with more modern devices. Realizing this is not going to be just plug and play, I had to dive into the world of hypervisors and CPU architectures.
Prerequisites:
Hypervisors that supports arm architecture (VMware fusion & UTM)
Windows server and desktop (11) ISO for arm devices.
First let’s get started with the tricky part, obtaining the ISO. While you can get the Windows 11 ISO file fairly easily even for the ARM-based architecture, Windows doesn’t have an official ARM-based image for Windows Server. We either have to get it by signing up for the Windows Insider Program or the cooler way. We can pull directly from the source and build the ISO locally.
As for the Windows 11 ISO file and UUP Dump, you can get them from Microsoft through the link provided below.
UUP Dump :
Windows 11 :
https://www.microsoft.com/en-us/software-download/windows11arm64
Note : For our lab we are going to go with a minimal setup that contains a domain controller and two Windows machines connected to the service, which we will try to exploit and play around with.
Active directory
Before the setup, let’s explore what Active Directory is in brief. In a nutshell/simple terms, it is an identity management service developed by Microsoft. It implements authentication using Kerberos, and for non-Windows systems, LDAP or RADIUS is used.
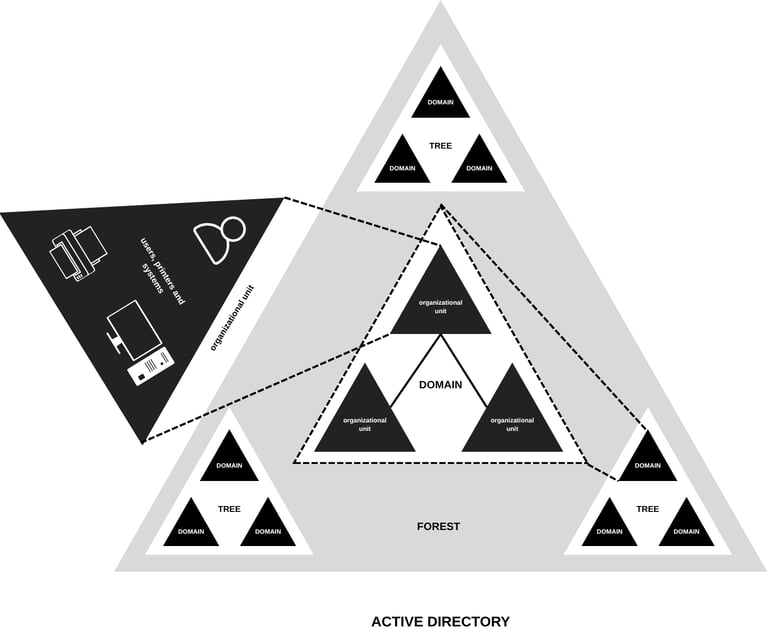
Most companies use AD to structure their organization and keep everything connected and in control. There are several components in AD; some of them are physical, and some can be classified under logical. The physical components are the data store, domain controller, global catalog server, and read-only domain controller (ROPC). The logical components include partitions, schemas, domains, domain trees, forests, sites, and organizational units.
Domain controller
It is a server that has Active Directory Domain Service (AD DS) running on it. It provides authentication and authorization services and allows admin access to manage user accounts and network services.
AD DS Data Store
It contains all database files related to AD, like information on users, services, and applications. It contains the ntds.dit file, which is the core of the active directory. It contains information on user and group objects, password hashes, computer accounts, schema information, configuration data, and security identifiers (SIDs).
Logical components:
Object → Anything in the network from users to printers to computers to organizations falls under object; these are fundamental entities that make up the structure.
Organizational unit (OU) → Containers that contain users, groups & computers (objects).
AD DS Scheme → Ruleset for all types of object creation and configuration.
Domains → Used to group and manage objects.
Tree → A hierarchy of domains also called domain trees.
Forest → hierarchy of trees.
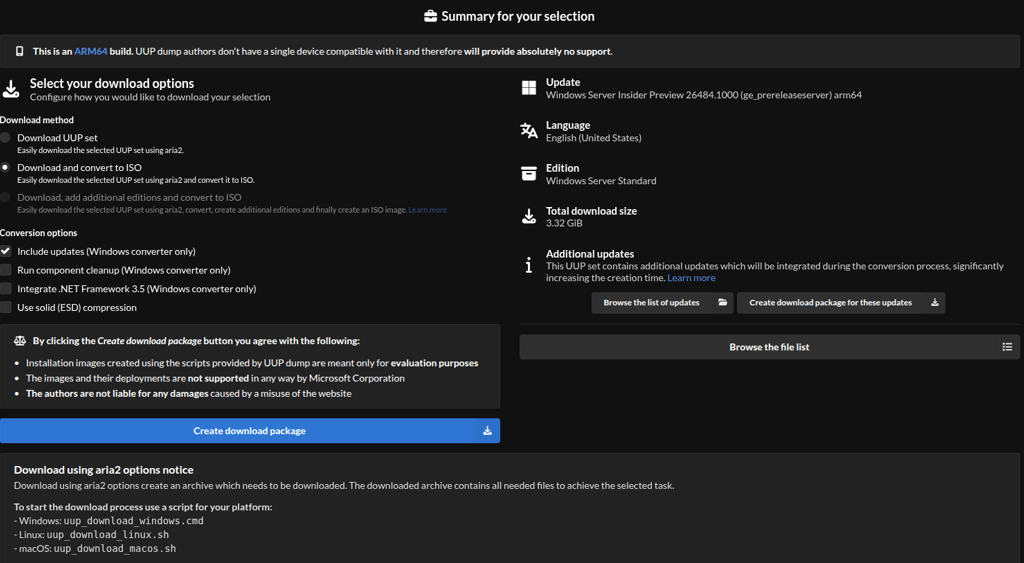
Get the script from the UUP dump. Read the readme file first, run the shell script, and it should download and compile the Windows Server 2025 ARM ISO file from the Windows servers. Make sure to check on the Download and convert ISO option so the script can generate accordingly.
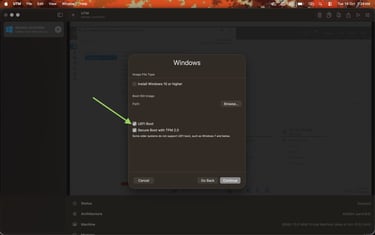
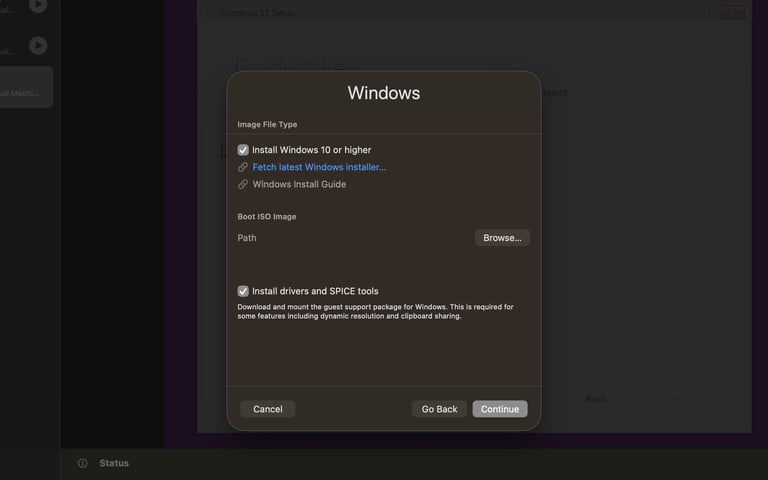
Once done, you should have an ISO image that can be on ARM bare metal. Then we move with the virtualization process using the UTM. Get the UTM app for Mac from the App Store or the link given below and install it. Once done, open the app, click on virtualize, uncheck auto download, choose the ISO that we downloaded, check UEFI and safe boot options, allocate the memory and storage, and create the VM.
Alternatively, you can choose the emulate option to run other architecture ISO images on ARM devices, but since it’s slow and consumes more resources, it’s not advisable if you’re with limited resources.
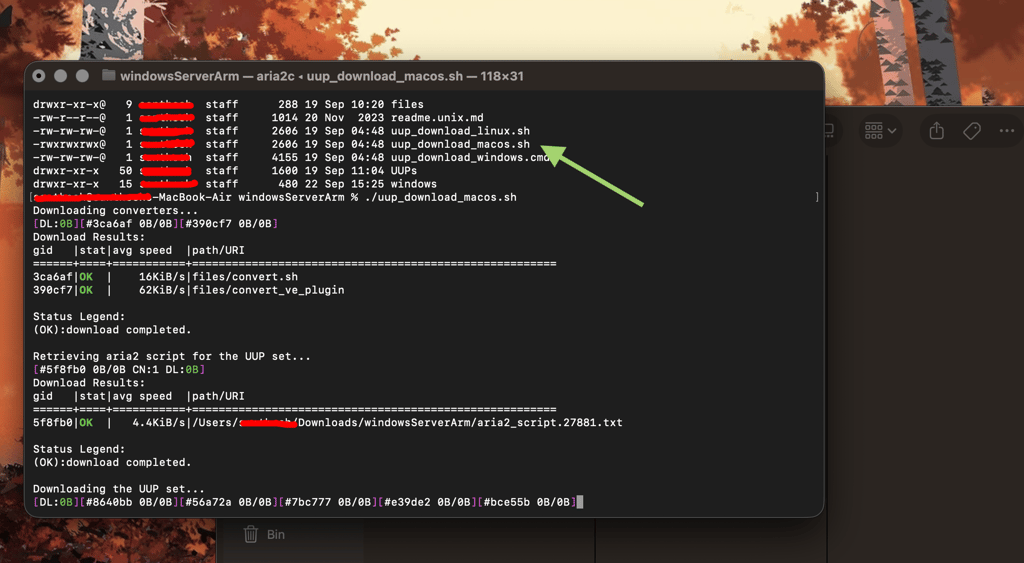
Open the downloaded folder in your terminal, install the requirements, and run the script.
brew tap sidneys/homebrew
brew install cabextract wimlib cdrtools sidneys/homebrew/chntpw
./uup_download_macos.sh
The download process will look something like this.


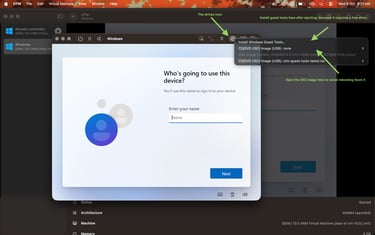
Start booting up the VM and follow the standard installation procedure for Windows. Note that once Windows is installed, click on the CD icon at the top and eject the ISO to avoid rebooting from the CD drive again. Also install the guest VM tools while you’re at it.
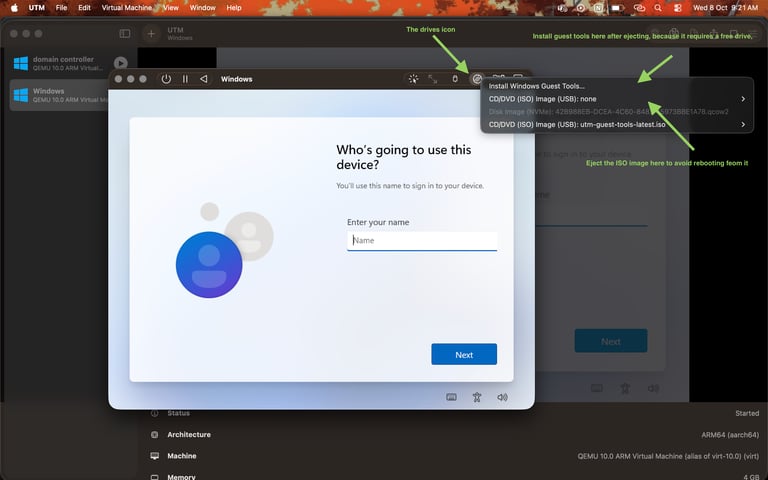
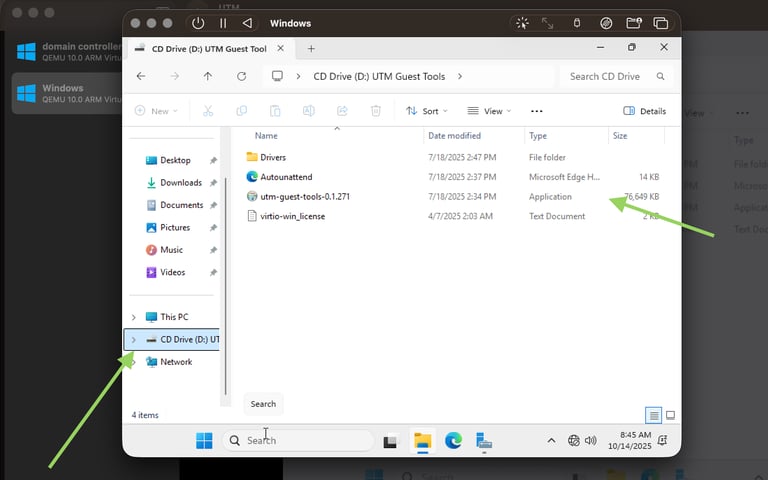
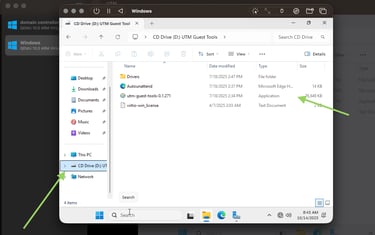
If the guest tools is not auto installed you can always find it in file explorer under cd drive, from there you can install it manually. After installation your network and other stuff like display should work as intended.
Now that the Windows server is installed and all, let's set up the domain controller. Click on the manage options in the server manager and choose "add roles and features," then follow the installation process as per the GIF given below.
Note : make sure to leave the defaults on and choose Active Directory Domain Services on the server roles tab.
After installing the necessary services, let's configure the domain controller. Click on the PROMOTE THIS SERVER TO DOMAIN CONTROLLER option, check on ADD NEW FOREST, enter the domain name, enter the password, leave the default values, and hit NEXT while the system does the checks, and hit INSTALL. Let the system reboot. You have a domain controller in your hands now!
Client Machines
For client machines, use the same installation process as for Windows Server; just swap the ISO. As long as it's under the same network, it should show up. But instead of choosing UEFI while creating a VM, go with default settings as shown in the image below to avoid unnecessary problems. If you end up in the boot menu, click any key, or if you entered setup, type "exit," then choose "continue" in the boot menu.
Bare metal installation
As for bare metal like Raspberry Pi, we don't need a hypervisor; just create an installation media with the ISO and boot from it, and it should run like a champ.
Conclusion
In today's rapidly changing cyberspace, both hardware and software are evolving at unprecedented rates. The devices are getting smaller and thinner, while the software is becoming more optimized and stable. Unlike in the past, you don't need a whole rack of hardware anymore; all you need is a couple of handheld devices to simulate the entire enterprise infra (of course, for practice), which enables everyone to learn/practice advanced cybersecurity concepts that were inaccessible to the common techie just a few years ago.
All rights reserved © 2025 - Present MalwareHunts. For educational and research purposes only. MalwareHunts is not responsible for any misuse of the information provided.