Run a VM with Secure Boot Enabled on Linux (kernel driver not installed (rc=1908)
GUIDES
Cipherc4t
10/10/20254 min read


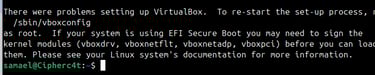
On Linux, Secure Boot blocks unsigned VirtualBox DKMS modules (vboxdrv, vboxnetflt, vboxnetadp, vboxpci) from loading.
After each kernel update, DKMS rebuilds them, but they won’t load unless signed. So after every update, users must manually sign the modules to run their VMs.
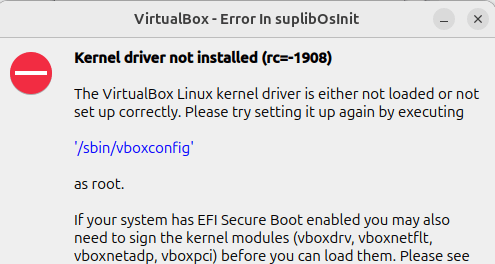
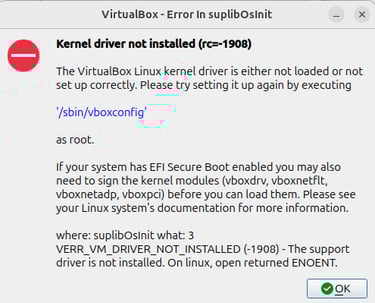
This is why, when starting the virtual machine,
Linux may show an error: Kernel driver not installed (rc=1908)
What Actually Happens
Secure Boot is a UEFI feature. During boot, UEFI checks that the kernel and its modules are signed with a trusted key.
If the signatures are valid, the system boots normally.
If they’re unsigned or invalid, boot is blocked unless Secure Boot is turned off.
If Secure Boot is disabled, this verification does not occur. The kernel still loads and works, but the extra integrity protection is lost.
That’s why researchers often disable Secure Boot on systems used to host VMs for malware analysis to avoid this repeated issue. But from a security view, this itself is a flaw, as it leaves the host vulnerable if a malware escape occurs.
What Happens If Secure Boot Is Disabled
Kernel and modules still load, but no verification is done at boot.
This means a rootkit that replaces your kernel/modules would not be stopped at boot.
For home labs, this is usually low risk if you patch regularly.
It is recommended if you want complete isolation and security ensured for the host.
Steps to Run a VM with Secure Boot Enabled
Step 1 :Check Secure Boot Status
Run : sudo mokutil --sb-state

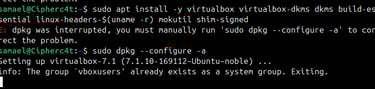
Step 2: Install Prerequisites (One-Time Setup)
Run the commands :
sudo apt update
sudo apt install -y virtualbox virtualbox-dkms dkms build-essential linux-headers-$(uname -r) mokutil shim-signed
If an error occurs, stop any running processes and delete the lock files using:
sudo kill -9 15797
sudo rm /var/lib/dpkg/lock-frontend
sudo rm /var/lib/dpkg/lock
sudo rm /var/cache/apt/archives/lock
sudo dpkg --configure -a

If everything goes smoothly, you’ll see this screen:
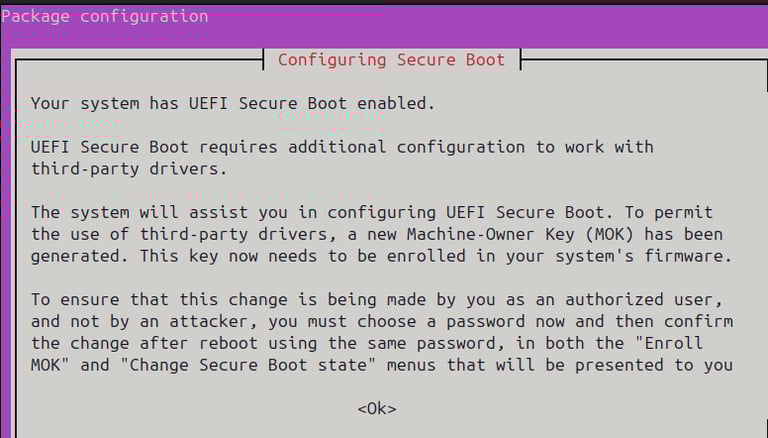
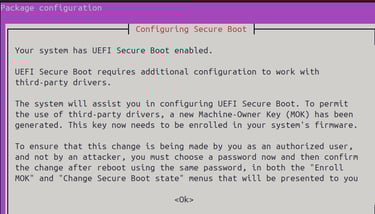
Select <ok>
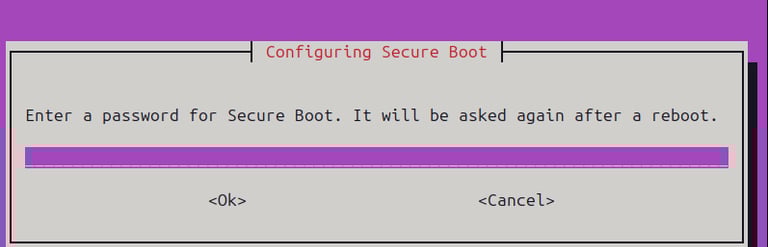
Step 3 :Set Password
The installer will ask you to set a password. Pick something simple and easy to remember.
This password is temporary and only used to authorize MOK enrollment at the next boot.
Note : When you reboot to sign the modules, you will be asked to enter this password again for confirmation.
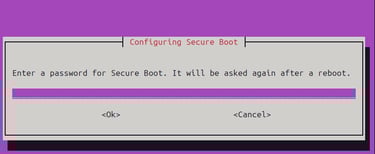
After setting the password, you’ll see this output:
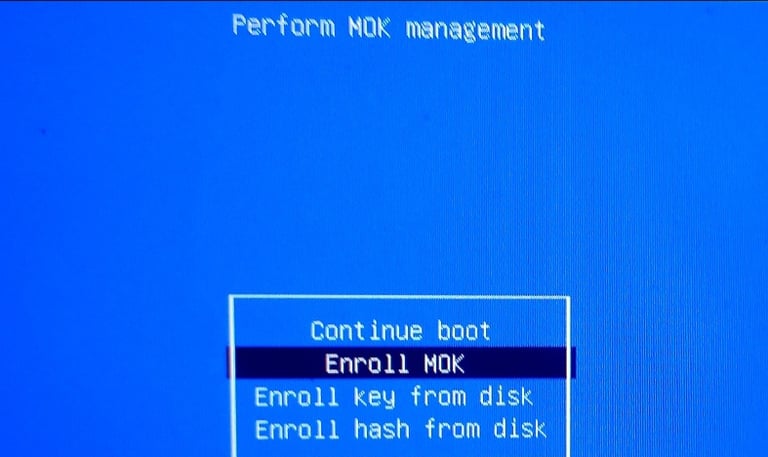
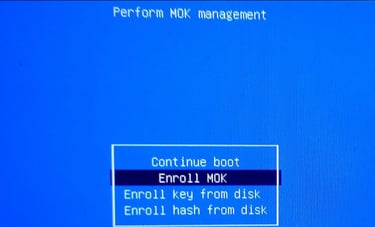
Step 4 : Reboot to Enroll MOK
Restart your system. During boot, it will detect the pending MOK enrollment and ask you to complete it.
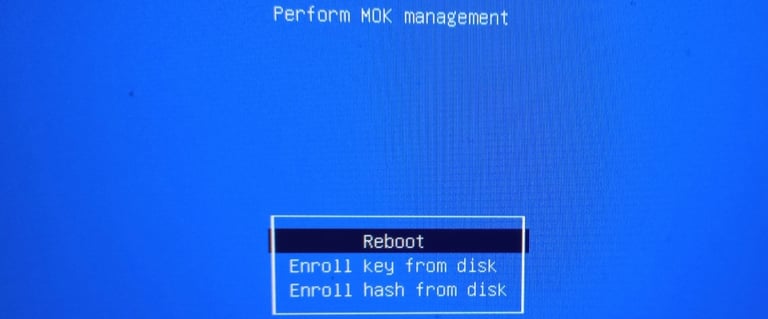
Enroll MOK in firmware
You’ll see a blue or gray UEFI menu labeled ‘MOK Management’ or ‘Enroll MOK’.
Select ‘Enroll MOK’, then ‘Continue’, and finally ‘Yes’.
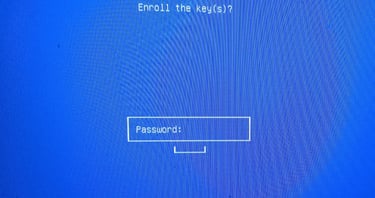
Enter the password you created in the previous step 3.
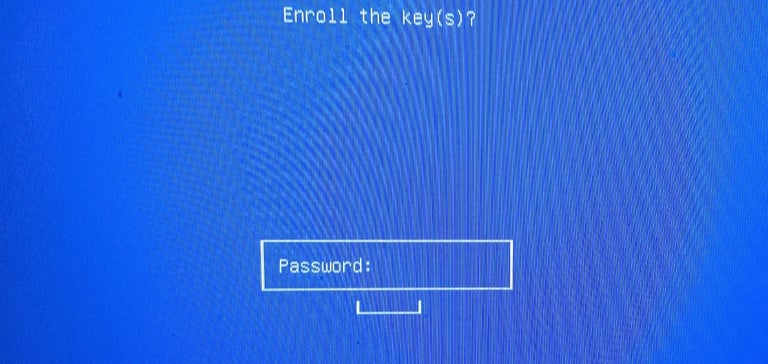
Confirm the enrollment and select ‘Reboot’ to complete the process.
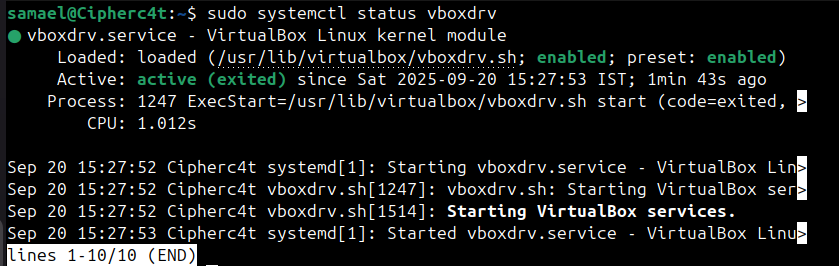
After these steps, the previously unsigned kernel modules (VirtualBox and DKMS) can load under Secure Boot.
Verify this by running: sudo systemctl status vboxdrv

Step 5 : Rebuild VirtualBox Modules After MOK Enrollment
Run : sudo /sbin/vboxconfig
Step 6 : Load VirtualBox Modules and Verify
Run the commands :
sudo modprobe vboxdrv vboxnetflt vboxnetadp
modinfo vboxdrv | egrep 'signer|sig_id|signature'
lsmod | grep vbox
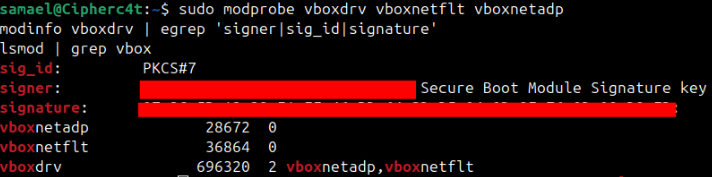
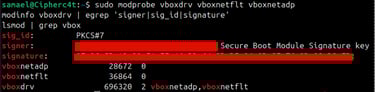
You should see a signer field and the modules marked as loaded.
If you see ‘permission denied’ or ‘module verification failed’, the key wasn’t enrolled correctly.
Repeat the process from the start.
Once done correctly, the virtual machine will launch without errors.
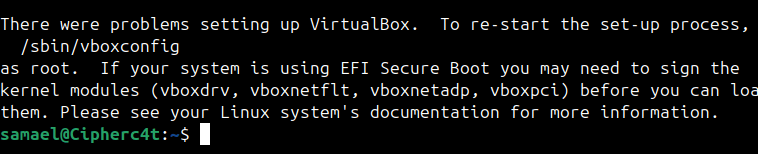
Error handling (KVM / driver issues)
Even after completing the signing process correctly, you may still see a KVM error that blocks the VM:
VT-x is being used by another hypervisor (VERR_VMX_IN_VMX_ROOT_MODE).
To fix this, close the VM and free Check if KVM is running.
Run : lsmod | grep kvm
if exists Unload KVM modules temporarily
For Intel CPUs,
Run : sudo modprobe -r kvm_intel kvm
For AMD CPUs,
Run : sudo modprobe -r kvm_amd kvm
Then try starting your VM again.
You may also see the same Kernel driver not installed (rc=1908) after a reboot or after kernel updates.
In this case you do not need to repeat all the steps, just sign in and load the modules as we did in step 5 and step 6 using the following commands :
sudo /sbin/vboxconfig
sudo modprobe vboxdrv vboxnetflt vboxnetadp
modinfo vboxdrv | egrep 'signer|sig_id|signature'
lsmod | grep vbox
This repeated process is why many users initially disable Secure Boot.
Download the PDF version of this guide here.
To build a hardened malware analysis lab on Linux, refer to this guide below.

All rights reserved © 2025 - Present MalwareHunts. For educational and research purposes only. MalwareHunts is not responsible for any misuse of the information provided.